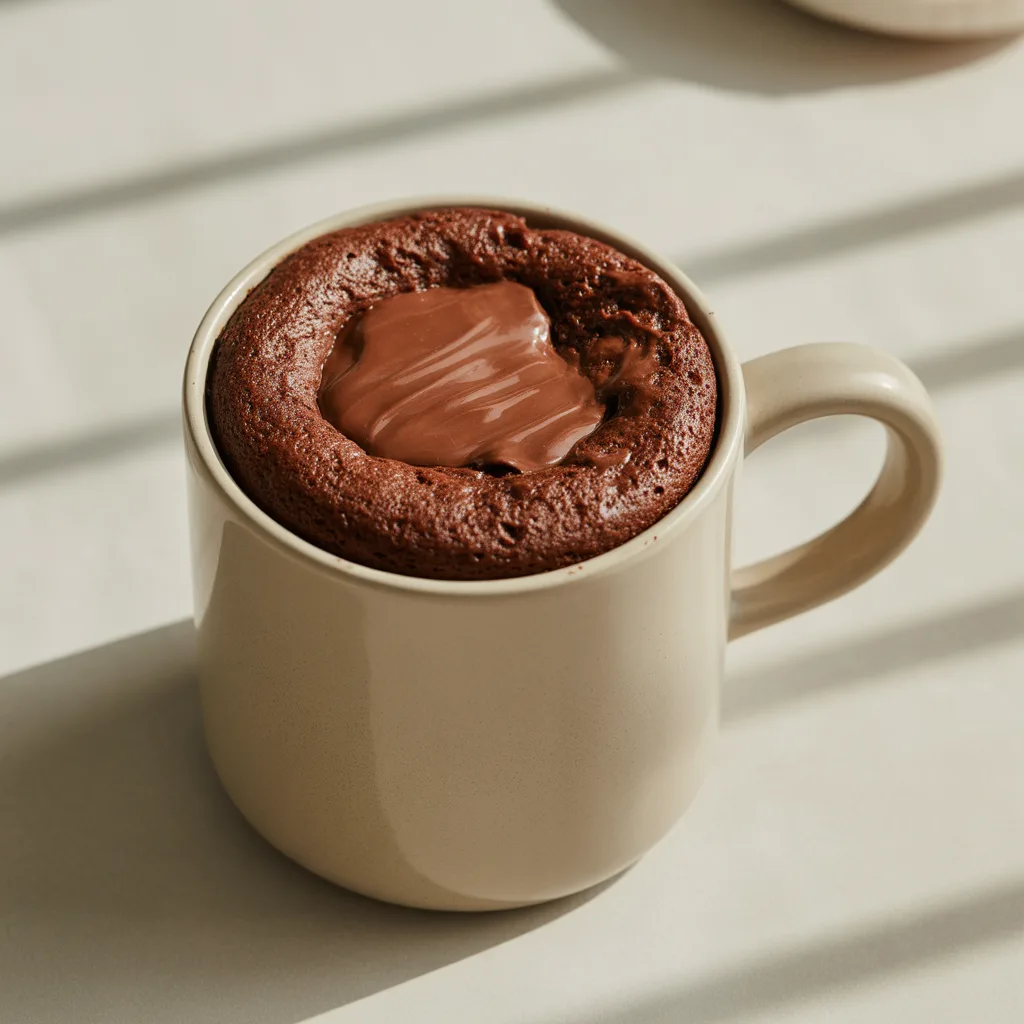
You know those moments when a chocolate craving hits and you just can’t wait? When baking a whole cake feels like a distant, impossible dream? That’s where this little miracle comes in. This Dairy Free Chocolate Lava Mug Cake is your secret weapon for a warm, gooey, and incredibly decadent dessert that’s ready in about five minutes. Seriously. It’s the kind of soulful, comforting treat my grandma would have whipped up, just without the dairy. And trust me, it’s so good you won’t miss it one bit.
Top Reasons To Make It
You’ll want to make this mug cake again and again. First, it’s incredibly fast. From mixing bowl to melted chocolate center, we’re talking five minutes. It’s the perfect single-serving dessert, so there’s no temptation lurking on the counter for days. It’s also naturally dairy free and can easily be made gluten free, making it a fantastic option for anyone with food sensitivities. But most of all, it’s just downright delicious. A warm, rich, and chocolaty hug in a mug.
Ingredients
- 1/4 cup all-purpose flour: The base structure of our little cake. For a gluten-free version, a 1:1 GF blend works perfectly.
- 2 tbsp granulated sugar: Just enough to sweeten the deal without overpowering the chocolate.
- 2 tbsp unsweetened cocoa powder: For that deep, rich chocolate flavor we all love.
- 1/4 tsp baking powder: Our leavening agent that gives the cake its lift.
- Pinch of salt: Balances the sweetness and enhances all the other flavors.
- 3 tbsp plant-based milk (almond, oat, or soy): Adds moisture and binds everything together.
- 1 1/2 tbsp neutral oil (avocado or vegetable): Provides fat for a tender, moist crumb.
- 1/4 tsp vanilla extract: A classic flavor booster that makes the chocolate sing.
- 1 tbsp dairy-free chocolate chips: The hidden treasure that creates that glorious molten lava center.
Instructions
- Grab a standard 12-ounce microwave-safe mug. Give the inside a very light coating of oil or a spritz of non-stick spray. This simple step ensures your cake slides out easily.
- Add the dry ingredients directly to the mug: the flour, sugar, cocoa powder, baking powder, and salt. Use a small whisk or a fork to mix them together until they’re one uniform color and there are no hidden pockets of flour.
- Pour in the plant-based milk, neutral oil, and vanilla extract. Stir everything together with your fork until you have a smooth, thick batter. Be sure to scrape the sides and bottom of the mug to incorporate all the dry ingredients.
- Now for the magic part: press the tablespoon of dairy-free chocolate chips right into the center of the batter. Don’t stir them in! Just push them down so they’re submerged. This is what creates that irresistible molten core.
- Place the mug in the microwave and cook on high for about 60 to 90 seconds. Start checking at 60 seconds—the top should look set and dry. The timing can vary based on your microwave’s power, so your perfect cake might take a few more seconds. Careful, the mug will be hot! Let it sit for a minute before digging in.
How To Customize Your Lava Cake
This recipe is a wonderful blank canvas. For a fun twist, try adding a quarter teaspoon of mint or orange extract instead of vanilla. You could also fold in a tablespoon of dairy-free chocolate chips or chopped nuts right into the batter for extra texture. A tiny pinch of espresso powder will amplify the chocolate flavor without making it taste like coffee. Honestly, a little swirl of peanut butter on top before microwaving is my personal favorite indulgence.
Variations & Substitutions
Need to make it gluten free? Simply swap the all-purpose flour for your favorite gluten-free 1:1 baking blend. For a refined sugar-free version, coconut sugar works beautifully. If you’re out of plant-based milk, water will work in a pinch, though the cake will be slightly less rich. And if you don’t have neutral oil, melted coconut oil is a fantastic substitute that adds a lovely hint of flavor.
Tips For Success
- Do not over-microwave! The key to the lava center is slightly under-baking the cake. If you microwave it too long, you’ll get a fully cooked, but still delicious, chocolate cake.
- Use a sufficiently large mug. The batter will rise as it cooks, so you need room to prevent any overflow.
- Let it rest for a minute after microwaving. This allows the cake to set a bit and prevents you from burning your tongue on that molten chocolate.
- For easy cleanup, mix your batter right in the mug. One mug means one dish to wash. A win in my book.
- Taste your batter. Seriously, it’s egg-free and safe to try! Adjust the sugar if you like things a bit sweeter.
Storage & Reheating
This treat is truly best enjoyed immediately. But if you somehow have leftovers, you can cover the mug with plastic wrap and store it in the refrigerator for up to a day. To reheat, just pop it back in the microwave for 20-30 seconds until warm. The lava center won’t be the same, but it will still be a tasty little snack.
Frequently Asked Questions
- Can I make this cake in the oven? Absolutely! Pour the batter into a small, greased ramekin. Bake in a preheated 350°F (175°C) oven for about 12-15 minutes, or until the edges are set but the center is still soft.
- What are the best dairy-free chocolate chips to use? I’m a big fan of Enjoy Life or Hu Kitchen gems for allergy friendly desserts. They melt beautifully and are free from most common allergens.
- Is this considered a healthy dairy free sweet? It’s certainly a better-for-you option compared to many conventional desserts, as it’s made with simple ingredients and is portion-controlled. It’s a wonderful treat to satisfy a craving.
- Can I double the recipe? You can, but I’d recommend making two separate mug cakes to ensure even cooking and that perfect lava flow. It only takes a minute more!
