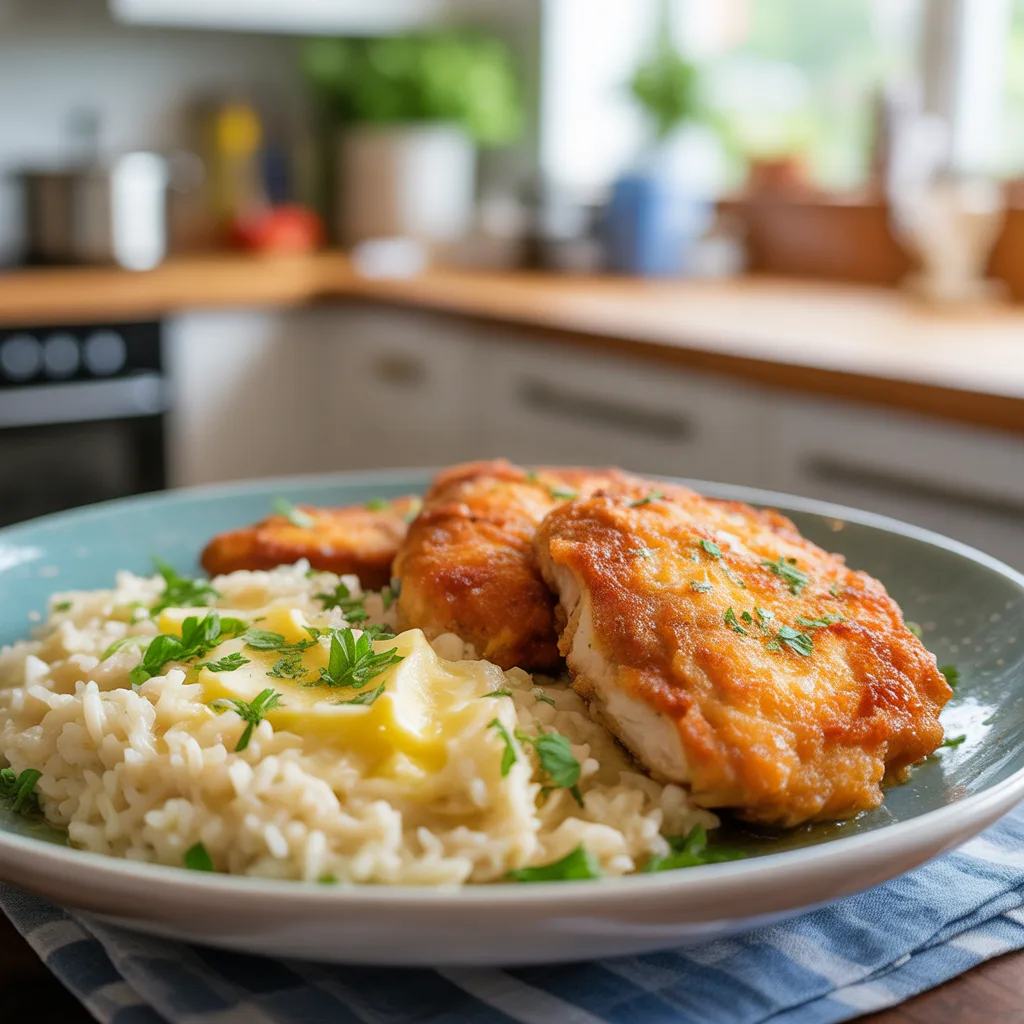
Is there anything more satisfying than that perfect, golden crunch? You know the one. It’s the sound of a crispy chicken cutlet meeting your fork that just promises a deliciously easy dinner is moments away. This recipe for Crispy Pan-Fried Chicken Cutlets with Buttered Rice is my absolute go-to for those nights when everyone is hungry, the clock is ticking, and you need a meal that feels like a cozy hug. It’s a simple, classic combo that never lets you down. And let’s be honest, who has time for complicated?
Why You’ll Love This
You’ll love this meal because it delivers the kind of comfort food satisfaction we all crave without keeping you chained to the stove for hours. From pantry to plate in about 30 minutes, it’s the epitome of a quick dinner idea that actually tastes incredible. The chicken is juicy on the inside with a wonderfully seasoned, crispy crust, while the buttery rice is so, so simple and comforting. It’s a guaranteed crowd-pleaser, making it a top-tier choice for kid friendly dinners and cheap dinners for a family. A total win-win.
Ingredients You’ll Need
- 4 thin-cut chicken breast cutlets (about 1 lb): Or pound regular breasts to ½-inch thickness for even cooking.
- 1/2 cup all-purpose flour: Creates the initial layer for the crispy crust to cling to.
- 2 large eggs, lightly beaten: The glue that helps the breadcrumbs stick.
- 1 cup panko breadcrumbs: The secret to an extra crispy, light texture.
- 1/2 cup grated Parmesan cheese: Adds a savory, salty punch to the coating.
- 1 tsp garlic powder: For that essential aromatic flavor.
- 1 tsp paprika: Adds a hint of sweetness and beautiful color.
- 1 tsp kosher salt: Seasons the chicken throughout.
- 1/2 tsp black pepper: For a little bit of spice.
- 1/2 cup neutral oil (like avocado or vegetable): For pan-frying to golden perfection.
- 1 cup long-grain white rice: The fluffy base for our buttery side.
- 2 cups chicken broth: Cooks the rice with more flavor than water.
- 2 tbsp butter: Stirred in at the end for richness.
- Fresh parsley, chopped (optional): For a pop of color and freshness.
Let’s Get Cooking Step by Step
- First, let’s make the rice. In a medium saucepan, combine the 1 cup of rice and 2 cups of chicken broth. Bring it to a boil over high heat. Once boiling, give it a quick stir, reduce the heat to low, cover with a tight-fitting lid, and simmer for 15-18 minutes. Don’t peek! Once the time is up, take it off the heat and let it sit, still covered, for 5 minutes. Then, fluff it with a fork and stir in the 2 tablespoons of butter until it’s all melted and glorious. Season with a pinch of salt if needed.
- While the rice is cooking, set up your breading station. You’ll need three shallow dishes. In the first one, place the 1/2 cup of flour. In the second, the 2 beaten eggs. In the third, combine the 1 cup of panko, 1/2 cup of Parmesan cheese, 1 tsp garlic powder, 1 tsp paprika, 1 tsp salt, and 1/2 tsp black pepper. Mix those dry ingredients well.
- Now, bread the chicken. Take one cutlet and dredge it in the flour, shaking off any excess. Next, dip it fully into the egg, letting any extra drip off. Finally, press it firmly into the panko mixture, making sure both sides are fully and evenly coated. Place the breaded cutlet on a clean plate and repeat with the remaining cutlets.
- Time to cook! Heat the 1/2 cup of oil in a large skillet over medium-high heat. To test if the oil is hot enough, flick a tiny bit of panko into it—if it sizzles immediately, you’re good to go. Carefully add two cutlets to the hot oil (don’t crowd the pan!) and cook for about 3-4 minutes per side, until the coating is deep golden brown and the chicken is cooked through. The internal temperature should reach 165°F. Transfer the cooked cutlets to a wire rack set over a baking sheet (this keeps them crispy!). Repeat with the remaining two cutlets.
- Let the chicken rest for a couple of minutes before serving. This is a great time to sprinkle on that optional fresh parsley. Serve your crispy cutlets alongside that fluffy buttered rice. So good.
Pro Tips For Perfect Chicken Cutlets
- Use a meat mallet, rolling pin, or even a heavy skillet to pound thicker chicken breasts to an even ½-inch thickness. This is the #1 trick for preventing dry, overcooked edges and a raw center.
- Set up your breading station right next to the stove. It makes the process so much smoother and contains the mess. And always use one hand for the dry ingredients and the other for the wet to avoid breaded fingers!
- Don’t skip the wire rack! Placing the fried cutlets on a rack instead of a paper towel-lined plate prevents the bottom from getting soggy from steam.
- Keep your oil temperature consistent. If it gets too hot, the coating will burn before the chicken is done. Too cool, and the chicken will absorb too much oil and get greasy.
- Honestly, if you’re short on time, grab pre-made thin-cut cutlets from the store. It’s a fantastic shortcut for easy weeknight dinners.
- Let the oil in your pan cool completely before you try to dispose of it. Pour it into an old jar or can, never down the drain!
Variations & Substitutions
This recipe is incredibly flexible! For gluten-free, swap the all-purpose flour for a 1:1 gluten-free blend and use gluten-free panko. If you don’t have panko, regular breadcrumbs work, though the crunch won’t be *quite* as spectacular. To make it dairy-free, simply omit the Parmesan cheese from the breading—it will still be deliciously crispy. Feel free to play with the seasonings, too. A little Italian seasoning or cayenne pepper mixed into the panko can create a whole new flavor profile. For an easy healthy dinner twist, you can bake the breaded cutlets on a parchment-lined sheet pan at 400°F for 15-20 minutes, flipping halfway through.
Serving Ideas & Pairings
These cutlets are the star of the show, but they love a good supporting cast. For a complete meal, pair them with simple steamed green beans, roasted broccoli, or a bright, crunchy coleslaw. A simple arugula salad with a lemony vinaigrette is another fantastic way to cut through the richness. They also make for fantastic easy lunch ideas the next day—chop them up and toss them into a salad or pile them on a roll with a bit of mayo for a killer sandwich. The possibilities are endless!
Storage & Reheating
Leftovers will keep in an airtight container in the fridge for up to 3 days. To reheat and keep them crispy, the oven or air fryer is your best friend. Preheat your oven to 375°F (or air fryer to 350°F) and warm the cutlets on a baking sheet for 5-10 minutes, until hot and re-crisped. Avoid the microwave if you can, as it will make the coating soft and soggy. The buttered rice reheats beautifully in the microwave with a splash of water to re-steam it.
Frequently Asked Questions
- Q: Can I make this ahead of time for meal prep?
A: Absolutely! This is a great candidate for healthy dinner ideas you can prep ahead. Cook the cutlets and rice, let them cool completely, and store them in separate containers in the fridge. Reheat using the oven/air fryer method for the chicken and the microwave for the rice. - Q: What’s the best way to get the breading to stick to the chicken?
A: The key is the three-step process: flour, egg, then breadcrumbs. The flour provides a dry base for the egg to grip, and the egg acts as the glue for the crumbs. Also, make sure to press the chicken firmly into the crumb mixture to really adhere it. - Q: I need more lazy dinners. Can I freeze these?
A: You sure can. After cooking, let the cutlets cool completely. Freeze them in a single layer on a parchment-lined baking sheet, then transfer to a freezer bag for up to 2 months. Reheat from frozen in a 375°F oven for 15-20 minutes.
