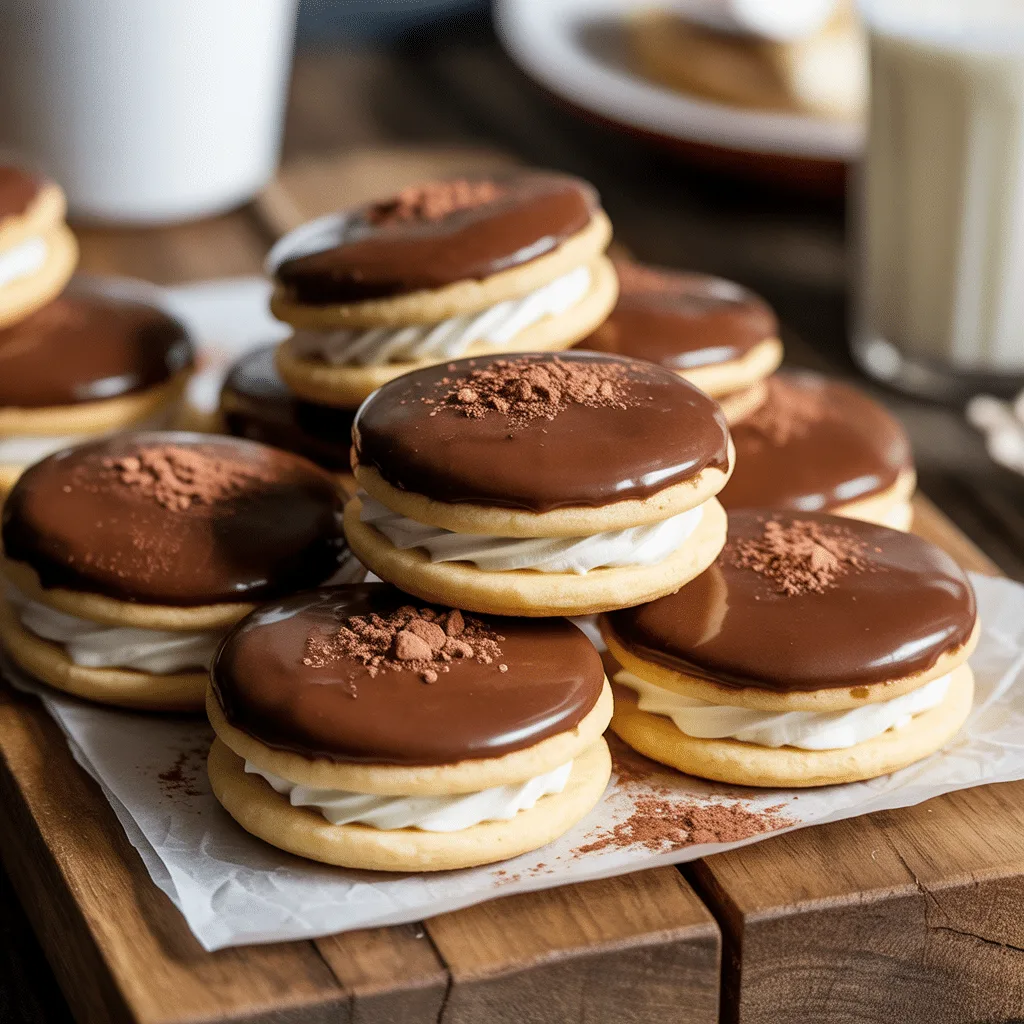
Ever have a major craving for a classic Boston Cream Pie but zero desire to layer cakes and fuss with a custard? Same, friend, same. That’s why these Boston Cream Pie Cookies are my new go-to. They capture every bit of that nostalgic, creamy, chocolatey goodness but in a fun, handheld bite that’s perfect for our busy lives. It’s all the flavor you love, without any of the fuss. Honestly, I think these might just become your new favorite party trick.
Perfect for Celebrations and Gatherings
These mini desserts are the ultimate party pleaser. They look like you spent hours in the kitchen, but the secret is they come together with a few simple shortcuts. Whether you’re heading to a potluck, need a standout treat for the school bake sale, or just want to impress your book club, these Boston Cream Pie Bites are the answer. They’re perfectly portioned, totally mess-free, and let’s be real, everything is just more fun in mini form. So good.
How to Make Boston Cream Cookie Cups
First, we’ll talk about what you need and why. The ingredients for these Boston Cream Pie Cookie Bites are pretty straightforward. You’ll need a sugar cookie mix for the base—this is our big time-saver, giving you a soft and sweet cup. For the filling, instant vanilla pudding and milk create that iconic, luscious cream center in a fraction of the time. And finally, semi-sweet chocolate chips and a bit of heavy cream make that silky, rich ganache that drapes over the top. The exact measurements will be in the recipe card below, but knowing the purpose of each component helps you understand the magic!
Now, for the fun part: putting it all together.
- Start by preheating your oven to 350°F (175°C) and generously greasing a mini muffin pan. This prevents any sticking drama later.
- Prepare the sugar cookie dough according to the package directions. Then, press a small ball of dough into each cup of the mini muffin tin, making sure to push it up the sides to form a little well.
- Bake for about 10-12 minutes, or until the edges are just turning a light golden brown. They will puff up, but you’ll create a indent for the filling using the back of a measuring spoon right when they come out of the oven. Let them cool completely in the pan.
- While the cups cool, whip up the filling. Whisk the instant pudding mix and milk together for a full two minutes until it’s thick and dreamy. Pop it in the fridge to set up for a few minutes.
- For the ganache, heat the heavy cream in the microwave until it’s just beginning to simmer. Pour it over the chocolate chips in a heatproof bowl and let it sit for a minute. Then, stir until it’s completely smooth and glossy.
- Now, assemble your masterpieces! Pipe or spoon the pudding into the cooled cookie cups. Then, drizzle that beautiful chocolate ganache over the top of each one.
- The hardest part: let them set for about 15 minutes so the chocolate can firm up a bit. This makes them so, so much easier to serve.
Variations & Substitutions for Your Recipe
This recipe is wonderfully adaptable. For a dairy-free version, use your favorite plant-based milk and dairy-free chocolate chips. The pudding mix might need a dairy-free alternative as well. Not a fan of vanilla? You could use cheesecake or white chocolate instant pudding for a different creamy twist. And if you’re feeling fancy, a teaspoon of orange zest in the cookie dough or a pinch of espresso powder in the ganache can add a really special layer of flavor. Honestly, if you’re a coconut lover, a sprinkle of toasted coconut on top of the chocolate would be absolutely delicious.
Storage & Reheating Tips for Freshness
These Pie Bites are best enjoyed the day they’re made, but they’ll keep just fine if you have leftovers (a rare occurrence in my house!). Store them in a single layer in an airtight container in the refrigerator for up to 3 days. I don’t recommend freezing the fully assembled cookies, as the pudding can get a bit watery when thawed. But you can absolutely freeze the baked and cooled cookie cups alone for up to 2 months! Just thaw and then fill them fresh when you’re ready.
Serving Suggestions for Parties and Events
Presentation is everything with these Quick Dessert Recipes. Arrange them on a beautiful cake stand or a simple white platter to let that dark chocolate topping really pop. For a bigger gathering, set up a DIY Boston Cream Pie Cookie bar! Have the baked cookie cups, a bowl of pudding filling, and the warm ganache available with toppings like sprinkles, crushed nuts, or fresh berries. It’s a fantastic way to get everyone involved and lets people customize their own perfect Finger Dessert.
Frequently Asked Questions
- Can I make these Boston Cream Pie Minis ahead of time? You can bake the cookie cups a day ahead and store them in an airtight container at room temperature. Assemble them with the filling and ganache the day you plan to serve them for the best texture.
- My ganache is too thick. What did I do wrong? No worries! This is an easy fix. Just pop it back in the microwave for a few seconds and stir in a teaspoon of warm heavy cream at a time until it reaches your desired drizzling consistency.
- What’s the best way to fill the cookie cups without making a mess? I’m a huge fan of using a disposable piping bag or a zip-top bag with a corner snipped off. It gives you so much more control than trying to use a spoon.
There you have it! A dessert that feels fancy but is completely approachable. I hope these Boston Cream Pie Cookies bring a little joy and a whole lot of flavor to your kitchen and your next celebration.
