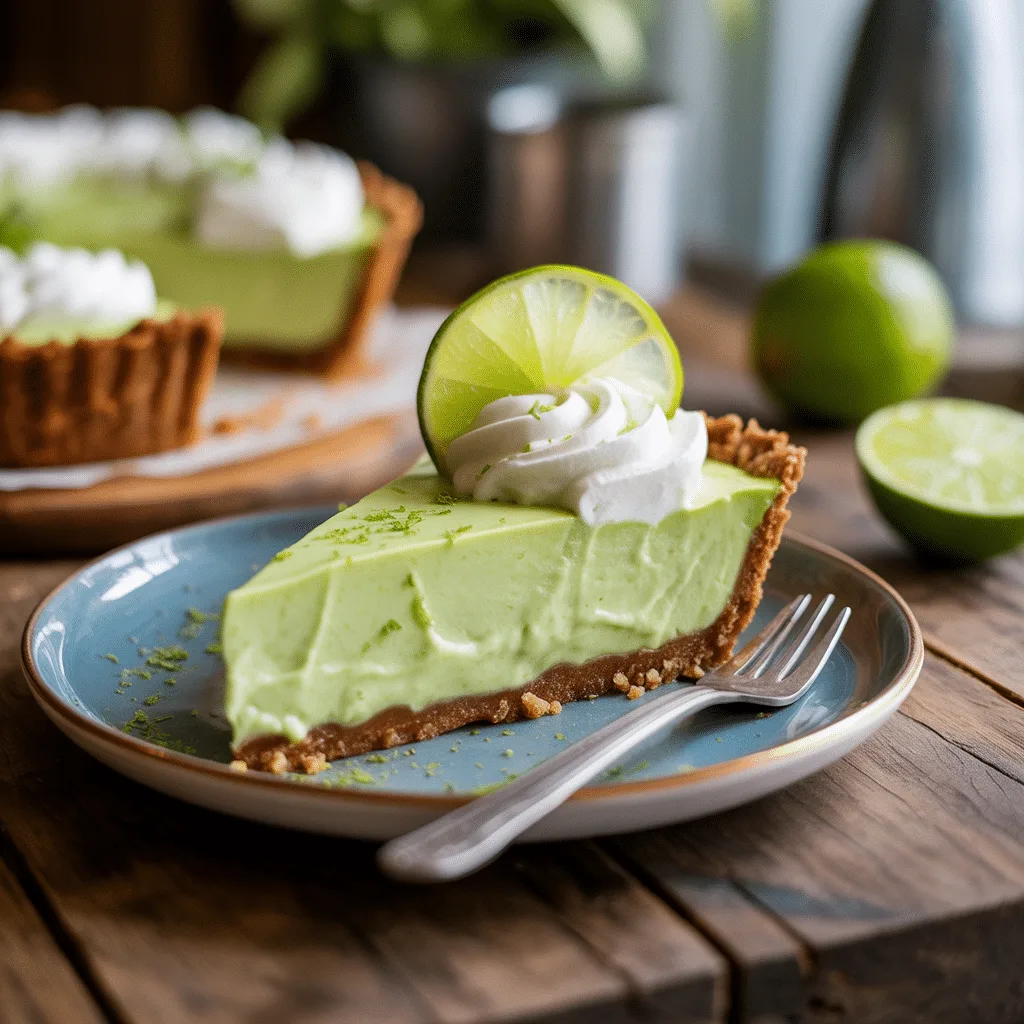
Is there anything more refreshing than a slice of cool, creamy key lime pie after a long day? It’s that perfect balance of sweet and tart that just makes you feel happy. But if you think going vegan means giving up on classic desserts like this, I’m here to show you otherwise. With a few simple swaps, we can create a Vegan Key Lime Pie that’s every bit as dreamy and satisfying as the original. Trust me, this one’s a real crowd-pleaser.
Top Reasons To Make It
You’re going to love this recipe. First off, it’s incredibly simple. You don’t need any fancy baking skills to get it right. The filling comes together in a blender, and the crust is a simple press-in situation. It’s also the perfect make-ahead dessert for potlucks or family gatherings—it needs time to set in the fridge, so making it the day before is actually ideal. And honestly, the flavor is just phenomenal. So good.
Ingredients
Here’s what you’ll need to bring this sunny dessert to life. The exact measurements are detailed in the recipe card below, but this list gives you a peek at the stars of the show and why they work so well together.
- Graham Crackers: The base for our crispy, buttery crust.
- Vegan Butter: Binds the crust and gives it that rich, classic flavor.
- Raw Cashews: Soaked, they become the unbelievably creamy foundation of the filling.
- Canned Coconut Cream: The high-fat part of a can of full-fat coconut milk; it adds luxurious richness.
- Key Lime Juice: Fresh is best for that signature, bright tang.
- Maple Syrup: Our natural sweetener that balances the tart lime perfectly.
- Vanilla Extract: Adds a warm, comforting depth of flavor.
- Salt: Just a pinch to make all the other flavors pop.
Instructions
- Start by soaking your raw cashews in very hot water for at least 30 minutes. This is the key to a super smooth filling.
- While the cashews soak, make the graham cracker crust. Pulse the crackers into fine crumbs in a food processor, then mix with the melted vegan butter until it resembles wet sand.
- Press the crumb mixture firmly and evenly into a 9-inch pie plate. Bake at 350°F for 8-10 minutes, until it’s fragrant and slightly darker. Let it cool completely.
- For the filling, drain the soaked cashews and add them to a blender along with the coconut cream, key lime juice, maple syrup, vanilla, and salt.
- Blend on high for a full 2-3 minutes. You want it completely smooth and creamy. Be patient here—it makes all the difference.
- Pour the filling into your cooled crust and smooth the top. Carefully transfer the pie to the refrigerator to set for at least 6 hours, but overnight is best.
Crispy Crust Tips
A soggy bottom is the enemy of a great pie. Here’s how to ensure your graham cracker crust stays crispy and perfect.
- Press it firmly! Use a flat-bottomed cup or measuring cup to really compact the crumbs into the plate. This creates a solid barrier.
- Don’t skip the pre-bake. Those 8-10 minutes in the oven are crucial for toasting the crumbs and setting the butter, which helps prevent sogginess.
- Let the crust cool completely before you add the filling. Adding a cold filling to a warm crust is a one-way ticket to a soft base.
- For a little extra insurance, you can brush the cooled crust with a melted vegan chocolate bar. It creates a waterproof seal. So, so clever.
Variations & Substitutions
The beauty of this Vegan Key Lime Pie recipe is how adaptable it is.
- No key limes? Regular Persian lime juice works beautifully in a pinch.
- For a nut-free version, swap the cashews for 1 (14-oz) block of firm tofu, drained and pressed. The texture will be a bit firmer but still delicious.
- Feel free to use agave syrup or a powdered sugar alternative instead of maple syrup.
- Add some flair by stirring 1/2 cup of shredded coconut into the graham cracker crust mixture.
- For a fun twist, try making individual mini pies in a muffin tin instead of one big pie.
Kitchen Gear Needed
You won’t need any special equipment for this recipe, just a few basics.
- A good blender is non-negotiable for that silky-smooth filling. A high-speed blender works best.
- A food processor makes quick work of the graham cracker crumbs, but you can also crush them in a sealed bag with a rolling pin.
- A 9-inch pie plate is the perfect vessel.
- You’ll also need a spatula for scraping down the blender and pressing the crust.
Storage & Reheating
This pie is all about staying cool. Keep it covered in the refrigerator for up to 5 days. For longer storage, you can freeze it for up to 2 months. To freeze, place the set pie in the freezer uncovered for an hour until solid, then wrap it tightly in plastic wrap and foil. Thaw it overnight in the fridge before serving. Do not try to reheat it—this is a cold dessert!
Frequently Asked Questions
- Can I use bottled key lime juice? You can, but the flavor won’t be quite as bright and fresh as using freshly squeezed juice. If it’s all you have, it will still work.
- Why is my filling not thickening? This usually happens if the blender wasn’t run long enough to fully emulsify the fats. Make sure you blend for a full 2-3 minutes until it’s completely smooth. Also, ensure your coconut cream is nice and thick.
- What’s the best way to get clean slices? Dip your knife in very hot water, wipe it dry, and then make your cut. Repeat for every slice for beautifully clean edges.
- Is this keylime pie recipe gluten-free? The filling is, but the crust depends on your graham crackers. Simply use a certified gluten-free brand to make the entire pie gluten-free.
