Is there anything more satisfying than a breakfast that practically makes itself? The kind you can whip up on a lazy Sunday and enjoy all week long? I used to think a decent omelet required a skillet, a spatula, and my full attention. But then I discovered the magic of baking them. Hello, Baked Omelet Squares for Easy Meal Prep! This recipe is my go-to for busy mornings, brunch with friends, or just when I want a no-fuss, protein-packed start to my day. It’s hearty, it’s versatile, and it’s about to become your new best friend in the kitchen.
Why You’ll Love This
Honestly, what’s not to love? These baked omelet squares are the ultimate set-it-and-forget-it breakfast. They free you from the stove, so you’re not flipping individual servings while everyone else is eating. They cut into perfect, neat little squares that are just as good at room temperature as they are warm. They reheat like a dream. And they are so, so good for meal prepping. You get a whole week’s worth of healthy food ideas ready in one pan. It’s a total win for anyone looking for simple breakfast ideas that actually deliver on flavor and convenience.
Ingredients You’ll Need
- 10 large eggs: The sturdy base that holds everything together.
- 1/3 cup whole milk: For a wonderfully fluffy and tender texture.
- 1 tablespoon all-purpose flour: Our little secret to prevent a rubbery texture. It helps stabilize the eggs.
- 1 teaspoon baking powder: The key to a light, almost soufflé-like rise.
- 1 teaspoon kosher salt: To season everything perfectly.
- 1/2 teaspoon black pepper: For a little classic kick.
- 1 cup shredded sharp cheddar cheese: Because everything’s better with cheese.
- 1 cup chopped smoked turkey sausage: A savory, smoky swap for traditional ham.
- 1/2 cup diced bell peppers (any color): For a sweet crunch and a pop of color.
- 1/4 cup finely diced red onion: Adds a mild, aromatic bite.
- 2 tablespoons chopped fresh chives: For a fresh, mild onion flavor on top.
Let’s Get Cooking Step by Step
- First, preheat your oven to 350°F (175°C). Grab an 8×8 inch baking dish and give it a good spray with non-stick cooking spray. This little step guarantees your squares will pop right out later.
- In a large bowl, crack in your eggs. Add the milk, flour, baking powder, salt, and pepper. Now, grab your whisk and go to town. You want to whisk it until it’s completely smooth and you don’t see any little lumps of flour. This takes a good minute or two of vigorous whisking.
- This is where the fun begins. Stir in most of your shredded cheese (save a little for the top!), the chopped smoked turkey sausage, bell peppers, and red onion. Mix it all until every bit is coated in that glorious egg mixture.
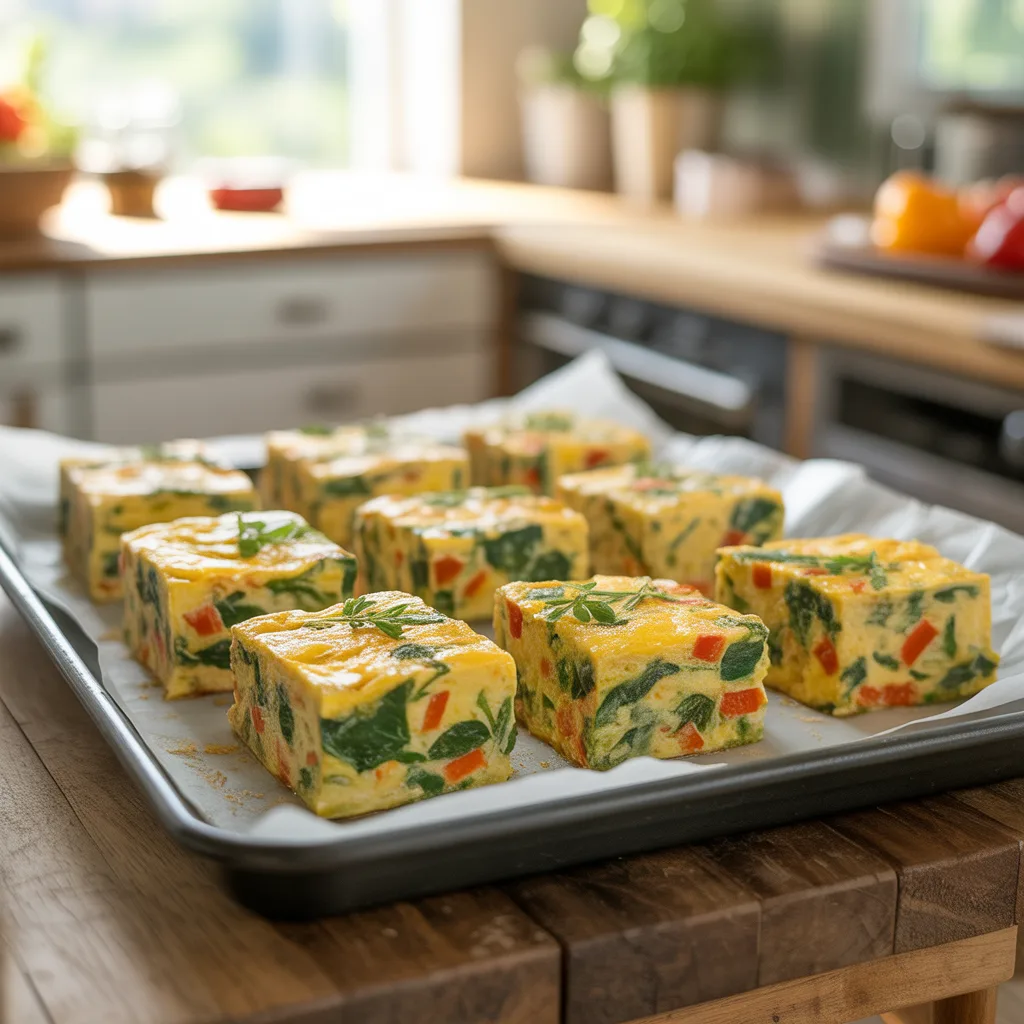
- Carefully pour the mixture into your prepared baking dish. Use a spatula to make sure it’s spread out evenly. Sprinkle the remaining cheese and the fresh chives over the top. This gives you that beautiful, cheesy, golden-brown crust.
- Slide the dish into your preheated oven and bake for 30-35 minutes. You’ll know it’s done when the edges are golden brown and the center is completely set. A little jiggle is okay, but a knife inserted in the center should come out clean.
- This is the hardest part: let it rest. Take the pan out and let it cool for a good 10 minutes before you slice it. This allows everything to set up, making it much easier to cut into those perfect, clean squares.
Variations & Substitutions
The beauty of this recipe is that it’s a blank canvas. Don’t like peppers? Swap in chopped spinach or broccoli florets. Want to keep it vegetarian? Simply leave out the turkey sausage and add in some sautéed mushrooms and a bit of crumbled feta cheese. For a dairy-free version, use your favorite plant-based milk and cheese. Honestly, if you hate heat, skip the jalapeño. But if you love it, a finely diced jalapeño would be fantastic in here. Got a bunch of veggies in the fridge that need using? This is the perfect place for them. Just keep the total volume of add-ins to about 2 to 2 1/2 cups so the eggs can still do their job.
Oven Temperatures
Ovens can be notoriously finicky, so knowing your oven’s personality is key. The recipe is designed for a standard oven at 350°F (175°C). If you find your oven runs a little hot, maybe check it at the 25-minute mark. If it runs cool, it might need a few extra minutes. The most important thing is to look for that set center and golden edges. An oven thermometer is a cheap and super helpful tool to eliminate the guesswork and ensure your baked omelet squares come out perfectly every single time.
Serving Ideas & Pairings
These squares are the star of any breakfast buffet or morning spread. They are fantastic on their own, but they also play well with others. For a complete savory breakfast, serve them alongside a simple mixed green salad with a bright vinaigrette, some fresh fruit, or crispy hash browns. They’re also incredible tucked into a warm biscuit or an English muffin for a delicious breakfast sandwich on the go. A dollop of salsa or a drizzle of hot sauce takes them to a whole new level. So good.
Storage & Reheating
This is where the meal prep magic really happens. Let the baked omelet squares cool completely after you’ve sliced them. You can store them in an airtight container in the refrigerator for up to 4 days. For longer storage, they freeze beautifully for up to 2 months. Just place the cooled squares in a single layer on a baking sheet to freeze solid, then transfer them to a freezer bag. This prevents them from sticking together. To reheat, the microwave is your fastest bet—about 45-60 seconds on high for a refrigerated square. For a crisper edge, pop them in a toaster oven or a regular oven at 350°F until warmed through.
Frequently Asked Questions
- Can I make this the night before? Absolutely! This is one of my favorite easy breakfast ideas for overnight guests. Assemble the entire mixture in the baking dish, cover it tightly with plastic wrap, and keep it in the fridge overnight. In the morning, just take it out, let it sit on the counter for 10-15 minutes while the oven preheats, and then bake as directed. You might need to add a couple of extra minutes to the baking time since it’s starting cold.
- Why did you add flour and baking powder? I know it seems unusual for an omelet, right? But that tablespoon of flour helps prevent the eggs from becoming tough or rubbery. The baking powder gives the whole dish a fantastic, light lift, making it more like a savory soufflé than a dense egg bake. It makes a huge difference in the final texture.
- What’s the best way to cut clean squares? Letting it rest is non-negotiable. A sharp knife is your best friend here. And for the absolute cleanest cuts, you can even briefly run a knife under hot water, wipe it dry, and then slice. This works wonders for getting that aesthetic food look for your breakfast inspo photos!
