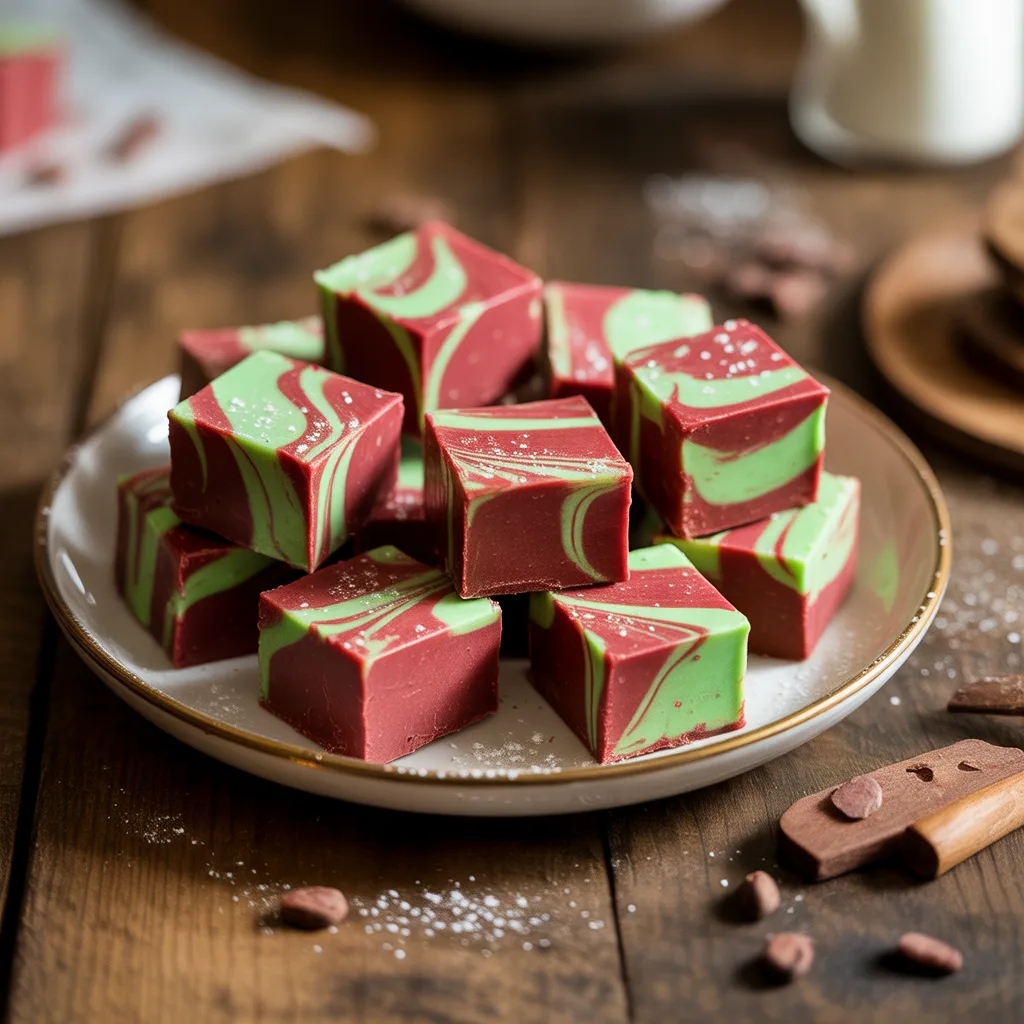
Is there anything more delightfully festive than a dessert that looks like it took all day but secretly came together in minutes? I used to stress about creating picture-perfect holiday treats until I realized that the best ones are often the simplest. These Red & Green Swirl Fudge Squares are my go-to for exactly that reason. They capture the vibrant spirit of the season without any of the fuss, making them a star among simple Christmas desserts. Honestly, they’re so easy you might just find yourself making a second batch before the first one is even gone.
Why You’ll Love This
This recipe is the holy grail for busy holiday seasons. We’re talking about a no-bake treat that requires just a handful of ingredients you probably already have. The magic happens when the rich, creamy white chocolate base gets divided and swirled with those gorgeous red and green colors. It’s a showstopper on any dessert platter, but the process is wonderfully forgiving. No candy thermometers, no complicated techniques—just sweet, creamy, and so, so pretty results. Perfect for last-minute Christmas party desserts or as a fun edible gift.
Ingredients You’ll Need
- 3 cups white chocolate chips: The creamy base for our fudge.
- 1 (14-ounce) can sweetened condensed milk: This is what gives the fudge its smooth, firm-yet-soft texture.
- 1 teaspoon vanilla extract: Adds a warm, classic flavor that complements the chocolate.
- 1/4 teaspoon salt: Just a pinch to balance the sweetness and make the flavors pop.
- Red gel food coloring: Gel works best for vibrant color without thinning the fudge.
- Green gel food coloring: For that perfect Christmas green swirl.
- Optional: Crushed candy canes or sprinkles for a festive topping.
Let’s Get Cooking Step by Step
- First, line an 8×8 inch baking pan with parchment paper, leaving some overhang on two sides. This little trick is your best friend for easy fudge removal later.
- In a medium saucepan, combine the white chocolate chips and the entire can of sweetened condensed milk. Heat this over low heat, stirring constantly, until the chocolate is completely melted and the mixture is smooth. This should only take about 5-7 minutes. Remember, low and slow is the key here to avoid scorching the chocolate.
- Remove the saucepan from the heat. Quickly stir in the vanilla extract and the salt until everything is well combined.
- Now, evenly divide the warm fudge mixture between two separate bowls. It doesn’t have to be perfect, just get it as close as you can.
- To one bowl, add several drops of the red gel food coloring. To the other bowl, add the green gel food coloring. Stir each bowl until the color is uniform. Start with a few drops and add more until you reach your desired festive hue.
- Here’s the fun part! Drop alternating spoonfuls of the red and green fudge into your prepared pan. Once all the fudge is in the pan, take a knife or a skewer and gently swirl it through the mixture just a few times to create a marbled effect. Don’t overmix, or you’ll end up with a muddy brown color instead of pretty swirls.
- If you’re using toppings like crushed candy canes, sprinkle them over the top now and gently press them in.
- Pop the pan into the refrigerator for at least 2-3 hours, or until the fudge is completely set and firm.
- Once set, use the parchment paper overhang to lift the entire block of fudge out of the pan. Place it on a cutting board and slice it into small squares. A sharp knife wiped clean between cuts works beautifully.
Pro Tips For Making Perfect Fudge
- Use high-quality white chocolate chips for the best flavor and texture. They tend to melt more smoothly than baking bars.
- Gel food coloring is highly recommended over liquid. Liquid can make the fudge mixture seize up or become too soft.
- Keep the heat low when melting the chocolate and milk. Patience is your friend here to avoid a grainy texture.
- Don’t over-swirl! Just a few figure-eight motions with a knife will give you the perfect red and green marbled look.
- For super clean cuts, you can briefly run your knife under hot water and dry it before slicing.
- And my favorite tip? Lick the spoon. It’s a chef’s privilege.
Variations & Substitutions
This recipe is a wonderful canvas for creativity. Want to add a little crunch? Stir a half-cup of crushed peppermints or holiday sprinkles into the fudge mixture right before you pour it into the pan. For a flavor twist, you could swap the vanilla extract for peppermint or almond extract. If you need a dairy-free version, full-fat coconut milk can often be substituted for the sweetened condensed milk, though the texture will be a bit softer. And if you’re not a fan of white chocolate, semi-sweet chocolate chips work just as well for a classic chocolate fudge base.
Serving Ideas For Christmas Desserts
These vibrant squares are a star on their own, but they truly shine as part of a larger spread. Arrange them on a festive plate alongside other holiday treats like sugar cookies and peppermint bark for a beautiful dessert board. They make fantastic additions to cookie swap parties or as a sweet little something placed at each guest’s setting. I love packing them in cute little boxes tied with a ribbon as heartfelt homemade gifts for neighbors, teachers, or friends. So good.
Storage & Reheating Instructions
Store your Red & Green Swirl Fudge Squares in an airtight container in the refrigerator. They’ll stay fresh and delicious for up to two weeks. You can also freeze them for longer storage—just layer them between sheets of parchment paper in a freezer-safe container for up to three months. Thaw them in the refrigerator overnight before serving. There’s no need to reheat fudge; it’s best enjoyed cool and firm straight from the fridge.
Frequently Asked Questions
- Q: My fudge is too soft. What happened? A: This usually means it didn’t set long enough in the fridge. Pop it back in for another hour or two. Using liquid food coloring instead of gel can also contribute to a softer set.
- Q: Can I use milk or dark chocolate instead? A: Absolutely! The method is exactly the same. You’ll lose the classic red and green color contrast, but you’ll still have delicious, swirled chocolate fudge perfect for your Christmas food ideas.
- Q: How far in advance can I make these for a party? A: They are a great make-ahead option! You can easily prepare them 3-4 days before your event. Just keep them stored in the fridge until you’re ready to serve.
- Q: Are there any other easy Christmas desserts that pair well with this? A: For sure! These fudge squares go wonderfully with simpler treats like rice cereal treats dyed with food coloring or a plate of assorted store-bought cookies. The goal is to enjoy the season, not spend all of it in the kitchen!
