Is there anything more delightfully creepy for a Halloween party than a platter of Witch Finger Cookies with Almond Nails? These spooky snacks are a total classic for a reason. They look terrifyingly real but they come together with such simple ingredients—and honestly, they’re just so much fun to make. I’ve been whipping up a batch every October since my kids were little, and let me tell you, the shrieks of laughter when they grab one are totally worth the effort. They’re the perfect edible prank and a must-have for your Halloween-themed food spread.
Why You’ll Love This
These cookies are the ultimate combination of playful, delicious, and surprisingly easy. They don’t require any fancy baking skills or special equipment. The dough is incredibly forgiving, so if your first finger looks a little more like a thumb, just roll with it. Part of the charm is that each one has its own quirky personality. They bake up with a wonderfully crisp texture that gives that satisfying *snap* when you bite into them. Perfect for dunking in coffee or a glass of cold milk. And the best part? They are a guaranteed conversation starter. Kids absolutely adore them, and adults get a real kick out of them, too. So good.
Ingredients You’ll Need
- 1 cup (2 sticks) unsalted butter, softened – The base for our rich, crisp cookie dough.
- 1 cup powdered sugar – Sweetens the dough without making it grainy.
- 1 large egg – Binds all our ingredients together.
- 1 teaspoon almond extract – Gives that classic, almost eerie flavor that pairs perfectly with the almond nails.
- 1 teaspoon vanilla extract – Adds a warm, comforting depth to the flavor.
- 2 ¾ cups all-purpose flour – The main structure for our witch fingers.
- 1 teaspoon baking powder – Helps the cookies puff up just a tiny bit.
- ½ teaspoon salt – Balances the sweetness and enhances all the flavors.
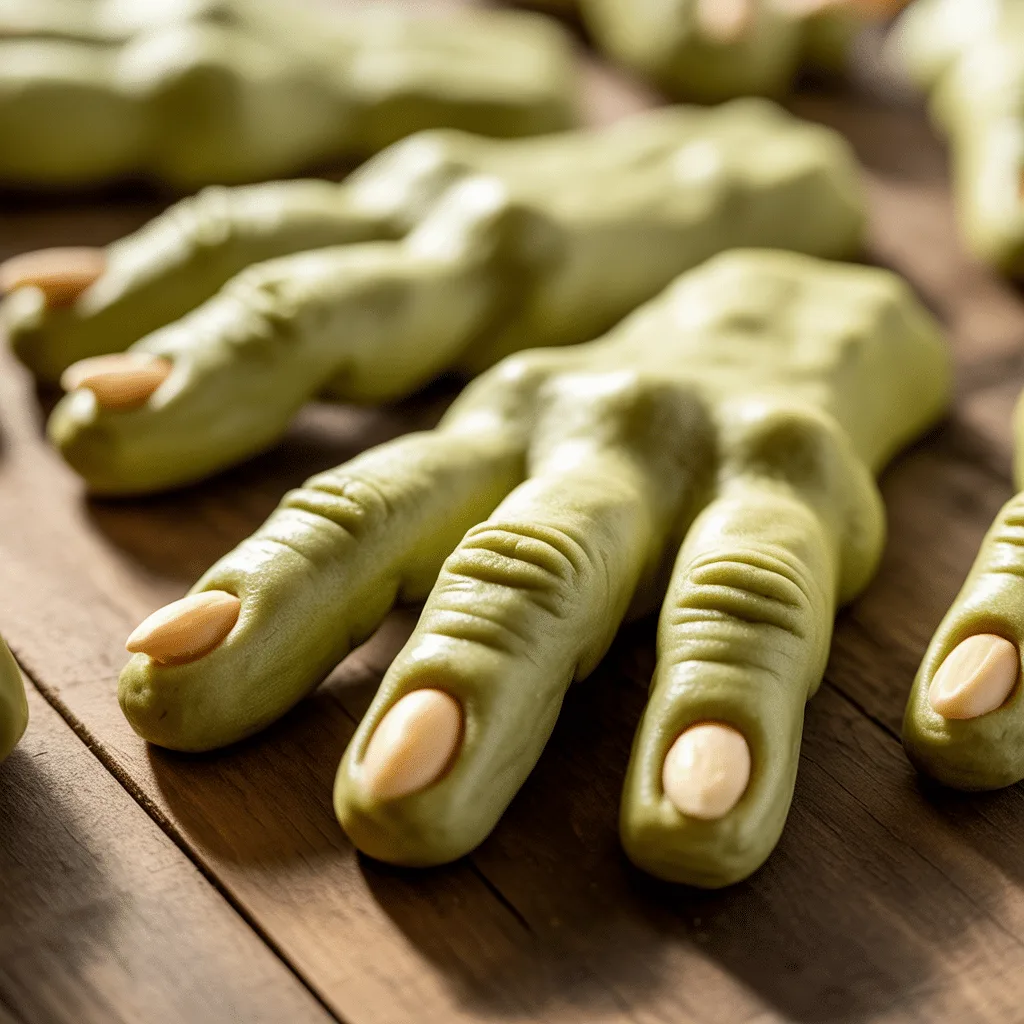
- ¾ cup whole almonds – For the creepy fingernails, obviously!
- Red gel food coloring – Just a drop to create that gruesome blood effect under the nail.
Let’s Get Cooking Step by Step
- First, let’s make the dough. In a large bowl, beat the softened butter and powdered sugar together with an electric mixer until the mixture is light and fluffy. This should take about 2-3 minutes.
- Beat in the egg, almond extract, and vanilla extract until everything is just combined.
- In a separate bowl, whisk together the flour, baking powder, and salt. Gradually add this dry mixture to the wet ingredients, mixing on low speed until a soft dough forms. Don’t overmix! Just bring it together into a ball.
- Now, wrap that dough in plastic wrap and chill it in the refrigerator for at least 30 minutes. This is a crucial step—it makes the dough so much easier to handle and roll into finger shapes.
- Preheat your oven to 325°F (165°C) and line two baking sheets with parchment paper.
- Time for the fun part! Working with one heaping teaspoon of dough at a time, roll it into a thin log shape, about 3 to 4 inches long. It shouldn’t be perfectly smooth; real fingers have knuckles! To create this effect, gently press the dough in a few places to form indentations.
- Place the shaped fingers on your prepared baking sheets. Now, take a whole almond and press it firmly into one end of the dough finger to create the nail.
- Using a small, clean paintbrush or a toothpick, add a tiny dab of red gel food coloring to the base of the almond nail. This creates that deliciously gross ‘blood’ effect.
- Use the back of a butter knife or a toothpick to score a few lines on the knuckles to make them look even more realistic.
- Bake for 20-25 minutes, or until the cookies are just starting to turn lightly golden around the edges. You want them to be firm.
- Let them cool on the baking sheet for a few minutes before transferring them to a wire rack to cool completely. They will firm up as they cool.
Spooky Snack Ideas for Halloween
These Witch Finger Cookies are a star on their own, but they’re even better as part of a full spooky dinner or a Halloween party spread. I love to create a creepy charcuterie board with these fingers poking out amongst some cheese “eyeballs” (mozzarella balls with olive pupils) and cracker “tombstones.” They’re also the perfect easy Halloween food to pair with a warm, savory soup for a Halloween dinner idea that balances the sweet. For a real showstopper, arrange them on a platter looking like they’re crawling out of a bowl of green-tinted cream cheese dip! The possibilities for Halloween finger foods are endless and so much fun to brainstorm.
Tips for Success with Witch Finger Cookies
- Really make sure your butter is softened. It should give slightly when you press it, but not be melty. This is key for getting the right dough consistency.
- Don’t skip the chilling time! A cold dough is what will keep your witch fingers from spreading into blob shapes in the oven.
- If the dough gets too soft while you’re working with it, just pop it back in the fridge for 10 minutes to firm up.
- Gel food coloring is best for the “blood” because it’s more concentrated and won’t make the almond soggy like liquid food coloring might.
- Get the whole family involved! Let the kids help with rolling the dough and pressing in the almonds. It’s a fantastic, fun Halloween activity.
- If your almonds keep popping off during baking, try pressing them in just a little deeper. You can also use a tiny dab of extra dough to “glue” them in place.
Variations & Substitutions
This recipe is wonderfully adaptable. For a nut-free version, you can simply skip the almond “nail” altogether and shape the end of the cookie into a fingertip, painting on a nail with food coloring. You could also use a slivered almond or even a sunflower seed for a different look. If you don’t have almond extract, you can use all vanilla extract, though you’ll lose that distinct flavor that makes them so classic. For a chocolate version, replace ½ cup of the flour with ½ cup of unsweetened cocoa powder for delicious chocolate witch fingers!
Storage & Reheating
These cookies store beautifully. Once completely cooled, keep them in an airtight container at room temperature for up to a week. They also freeze perfectly. Just layer them between sheets of parchment paper in a freezer-safe container or bag, and they’ll keep for up to 3 months. Thaw at room temperature before serving. There’s no need to reheat them, but if you love a warm cookie, you can pop them in a 300°F oven for about 5 minutes to crisp them up again.
Frequently Asked Questions
Can I make the dough ahead of time?
Absolutely! You can prepare the dough, wrap it tightly, and keep it in the refrigerator for up to 2 days before you’re ready to bake your Witch Finger Cookies. This can make your Halloween party prep so much easier.
My cookies spread a lot. What happened?
This usually means your butter was too warm or your dough wasn’t chilled long enough. Next time, make sure to properly chill the dough and ensure your oven is fully preheated. Using a cool baking sheet for each batch also helps.
What are some other easy Halloween food ideas?
Oh, there are so many fun Halloween candy and snack ideas! For another simple treat, try making monster rice cereal treats or jack-o’-lantern stuffed peppers. Mummy hot dogs (using strips of crescent roll dough) are always a huge hit with kids and are the perfect spooky finger food for a party.
