Have you ever passed by a fancy bakery case, seen those perfect little macarons, and thought you could never make them at home? I’m here to tell you that you absolutely can, especially when they’re as festive and fun as these Santa Claus Macarons with Vanilla Cream Filling. Honestly, I used to be intimidated by them too, but there’s something magical about holiday baking that makes you want to try new things. These are a show-stopping treat that’ll have everyone at your Christmas party buzzing, and the process is half the fun. A little mess, a lot of laughter, and a whole lot of deliciousness.
Why You’ll Love This
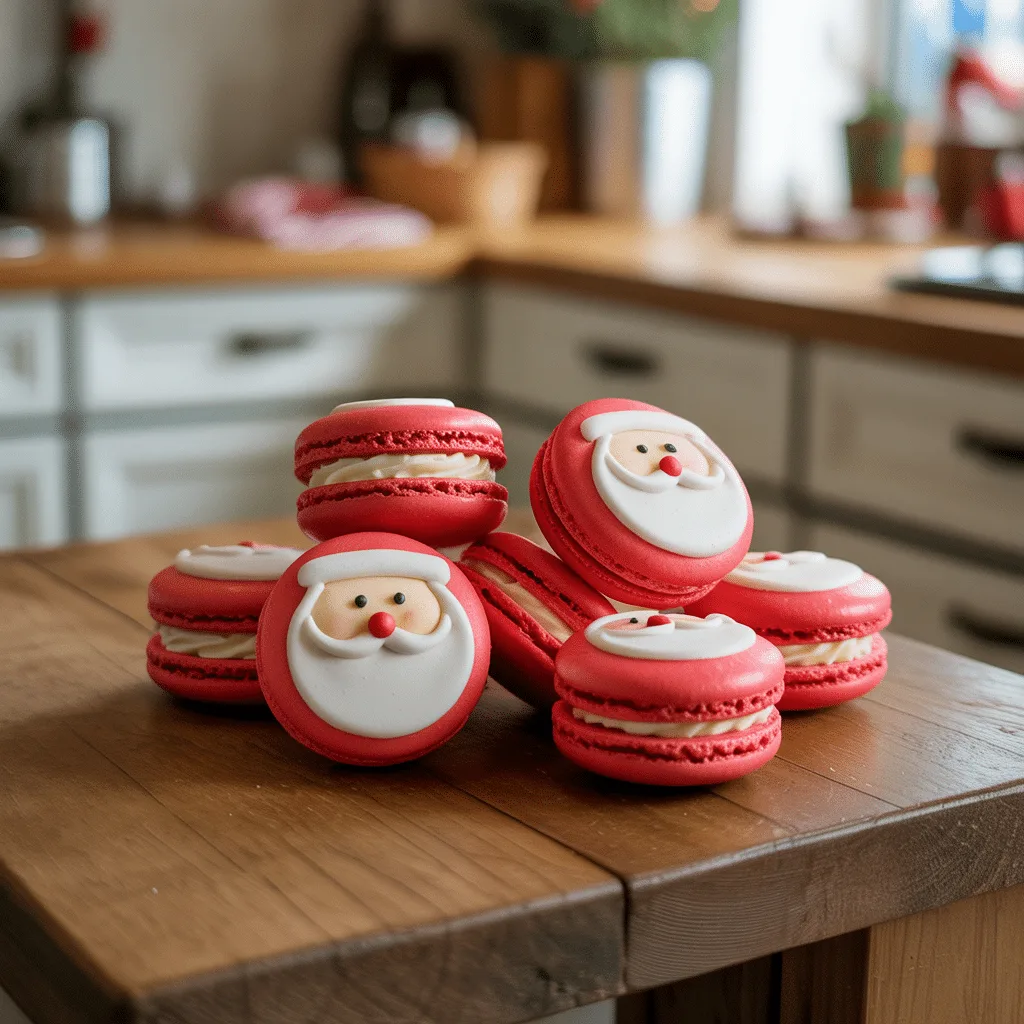
These aren’t your average, fussy French pastry. We’re making a simplified, forgiving version that’s packed with holiday spirit. They’re the perfect easy Christmas dessert because they look incredibly impressive but come together with a bit of patience and a whole lot of love. The crispy-yet-chewy shells give way to a cloud-like, sweet vanilla cream that is just so, so good. They’re bite-sized, which makes them ideal for holiday appetizers or a sweet treat on your Christmas brunch table. Plus, decorating them to look like Santa’s cute little face is a project the whole family can get in on.
Ingredients You’ll Need
- 3 large egg whites, at room temperature: For the meringue base that gives the shells their structure.
- 1/4 cup granulated sugar: Adds sweetness and helps stabilize the egg whites.
- 1 3/4 cups powdered sugar: The key to that smooth, classic macaron top.
- 1 cup super-fine almond flour: Creates the tender, nutty base of the cookie. Don’t try to substitute regular flour!
- 1/4 tsp cream of tartar: Helps the meringue get nice and fluffy.
- Red gel food coloring: For Santa’s iconic red hat. Gel works better than liquid for vibrant color.
- 1/2 cup unsalted butter, softened: The base of our rich filling.
- 1 1/2 cups powdered sugar: Sweetens and thickens the buttercream.
- 1 1/2 tsp pure vanilla extract: For that warm, classic vanilla flavor.
- 1-2 tbsp heavy cream or milk: To get the perfect piping consistency.
- Mini chocolate chips or edible black marker: For the eyes.
- White sprinkles or white icing: For the fluffy hat trim and beard.
Let’s Get Cooking Step by Step
- First, let’s get our dry ingredients ready. Sift the almond flour and 1 3/4 cups of powdered sugar together into a large bowl. This step is non-negotiable for getting those smooth tops, so don’t skip it! If you have a few coarse almond bits left in the sifter, just toss them out.
- Now, in a very clean, grease-free bowl, whip the room-temperature egg whites and cream of tartar with an electric mixer on medium speed until they get foamy. Slowly rain in the granulated sugar and turn the mixer up to high. Whip until you have stiff, glossy peaks that hold their shape. This should take 3-5 minutes.
- Add about half of your dry ingredients to the meringue and gently fold them in. Once mostly combined, add the rest. Fold carefully until the batter flows off your spatula in a thick ribbon, like lava. This is called the “macaronage” stage. Don’t overmix!
- Transfer about one-third of the batter to a separate bowl. This will be for Santa’s face. To the larger portion of batter, add several drops of red gel food coloring and fold gently until the color is uniform and vibrant.
- Line two baking sheets with parchment paper. Fit a piping bag with a round tip and fill it with the red batter. Pipe small, upside-down teardrop shapes for the hats. They should be about 1.5 inches wide. Now, using another piping bag (or just a spoon) with the plain batter, pipe round blobs underneath each hat to form his face. Tap the baking sheets firmly on the counter a few times to release any air bubbles.
- This is the most important step: let the macarons sit at room temperature for 30-60 minutes. They’re ready to bake when you can gently touch the surface and it feels dry and not sticky. This helps create the iconic “feet.”
- While they rest, preheat your oven to 300°F (150°C). Bake one sheet at a time for 15-18 minutes, rotating halfway through. They’re done when they don’t wiggle when you gently touch the top. Let them cool completely on the baking sheet before you even think about moving them.
- While they cool, make the filling. Beat the softened butter until it’s smooth and creamy. Gradually add the powdered sugar, then the vanilla extract. Beat on high for 2-3 minutes until fluffy. Add cream or milk, one tablespoon at a time, until it’s a pipeable consistency.
- Finally, assemble! Match similar-sized shells together. Pipe a small dollop of vanilla cream filling onto the flat side of a plain (face) shell. Gently press a red (hat) shell on top. Use a tiny dab of frosting to stick on mini chocolate chips for eyes and white sprinkles for the hat trim and beard.
Tips For Success With Macarons
- Room temperature egg whites are non-negotiable. They whip up so much better!
- Weigh your ingredients if you can. A kitchen scale is a macaron’s best friend for accuracy.
- Don’t skip the resting time. A dry surface is what gives your macarons their perfect little feet.
- If your first batch isn’t perfect, who cares? They’ll still taste amazing. Practice makes progress.
- Gel food coloring is your friend. Liquid coloring can change the batter’s consistency.
- Oven thermometers are cheap and a lifesaver. Oven temperatures can be off, and macarons are picky.
Serving Ideas & Pairings
These Santa Claus Macarons with Vanilla Cream Filling are a star all on their own. Arrange them on a festive platter as the centerpiece of your Christmas dessert ideas spread. They’re also wonderful alongside other holiday treats like peppermint bark or gingerbread cookies. For a Christmas brunch, they add a sweet and sophisticated touch next to savory quiches and fruit salad. And a cold glass of milk or a warm cup of hot cocoa? The perfect pairing for these delightful Christmas party food offerings.
Variations & Substitutions
- Nut-Free: While tricky, you can try sunflower seed flour as a substitute for almond flour. Just know the color and taste will be a bit different.
- Dairy-Free Filling: Use a sturdy vegan butter stick to make the vanilla cream. It works surprisingly well!
- Different Flavors: Add a drop of peppermint extract to the filling for a candy cane twist. Or add a teaspoon of cinnamon to the shell batter for a warm spice flavor.
- Short on Time? You can use a high-quality store-bought vanilla frosting for the filling in a real pinch. I won’t tell!
Storage & Reheating
These macarons actually get better after resting! Store them in an airtight container in the refrigerator for up to 5 days. The shells will soften slightly and become even more chewy and delicious. They also freeze beautifully for up to 2 months. Just place them in a single layer on a parchment-lined tray to freeze solid, then transfer to a freezer bag. Thaw in the fridge overnight. There’s no need to reheat them—they are best enjoyed cold or at room temperature.
Frequently Asked Questions
- Why did my macarons not develop feet? This is usually due to under-mixing the batter, not letting them rest long enough to form a skin, or an oven temperature that’s too low.
- Can I make these Santa Claus Macarons ahead of time? Absolutely! In fact, I recommend it. The filled macarons taste best after 24 hours in the fridge, as the flavors meld and the texture perfects itself. They are the ultimate make-ahead easy Christmas treats.
- My macarons are hollow. What happened? Hollow shells can be caused by over-whipping the meringue, over-mixing the batter, or baking at too high of a temperature. But hey, they’ll still be delicious filled with that vanilla cream!
- Are there other holiday desserts I can make with this method? You can use the same basic method and dye the shells green, or leave them plain and color the filling. The possibilities for Christmas dessert ideas are endless!
